But yes! My mother's favorite fruit is Raspberry. She loves raspberry EVERYTHING... And she LOVES white chocolate. Now, at the Bakery where I work, they make a White Chocolate Raspberry Cake. While I have never had it, I've always wanted to try it. White chocolate cake with a raspberry jam filling and whipped icing. Now, this seems like the perfect dessert for my mother on her birthday, but the cake where I work costs a pretty penny even with my discount, so I decided to tackle this delectable dessert on my own, and ended up saving a TON (which is quite the goal of this blog, right? Being able to learn to cook great food with using a college student's resources, one of which is a very limited income.)
So first I had to do some research, and I found the recipe I wanted to use HERE via The Herta Household Herald. I found it by google image searching "white chocolate raspberry cake," which is generally what I do when I am looking for a specific recipe.
So now that I have my recipe, let's get started!

My ingredients list!
1 box of white cake mix* <--- I chose to use Pilsbury Moist Supreme in Classic White. I always choose this brand when I can because the cake has a cup of pudding mix in it to make it suuuper moist and delicious.
3 egg whites (in the bowl. If you are wondering why they are in a bowl, I read here that you should always use room temperature eggs when baking!**
1 1/3 cups water (not pictured)
2 TBSP cooking oil
5 oz. white baking chocolate
2 16 oz containers of cream cheese frosting
1 18 oz jar of raspberry jam
As you can see, I strayed a bit from the recipe on the web site, which calls for only one can of the frosting (but I think that's because she made homemade buttercream to go on the outside of the cake, because 1 can is definitely not enough for the filling AND for the outside. Also, this recipe called for preserves while I used jam, because I'm not a fan of raspberry seeds... And the jam was SO tasty.
* I know! Using a baking mix is SO taboo in the baking world, but for a cheap college students, it's so much easier to spend $.98 on a baking mix than spend $10.00 on ingredients to bake a cake, which I most-likely won't have super proper-storage containers for and all of that. It's just easier and more cost-effective to use a mix, PLUS-- The people who I am (and will be) cooking for aren't really going to care if I use a boxed mix. Now... When I am in my own home with a family and a fully functioning kitchen that only I will be using, then MOS DEF will I be baking cakes and all other such things from scratch (or attempting to, anyways) but for now, mixes will do!
** I had never tried to bake cakes with room temperature eggs before. I tried to with the Oreo Cake but I don't think I let them sit long enough. These ones sat for quite a while, and when the cake came out of the oven, I didn't have those strange mounds that I get when I bake cakes normally, which was pretty awesome!

The first task you have is to separate your eggs. I'd never had to separate eggs before, and while one of them didn't come out so pretty, I just thought that the separated eggs looked really neat just chillin' in their shells.

After separating your eggs, combine the mix, oil, water and egg whites into a bowl. Here it is, looking particularly gruel-ish.

Then, using a mixer, (which I never used to use, but LOVE now) mix on LOW until ingredients are damp, and then mix on MEDIUM for 2 minutes until the mix is nice and smooth. I never used to use a mixer, but when I started with this recipe, I noticed how much more smooth the batter came out. It seemed to have a much better texture, and when the cake came out of the oven it was lighter and fluffier and much better than cakes turn out when I mix the batter by hand!

I think cake batter smells so heavenly, and I would probably sit there and eat it with a spoon for however long I could go without getting sick from all the sweetness!

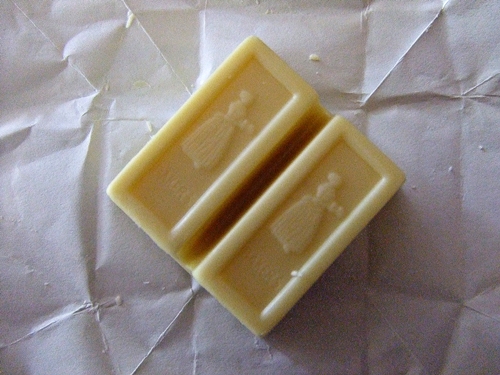
The next step is to melt your white chocolate squares. My method of choice is breaking up the cute little bars in half and put them in a glass bowl, then microwave on Power 7 for 30 seconds, stirring until it is all nice and melted.

Ahhhh, perfection! It was smooth and creamy and smelled AMAZING and was not scorched!

So add your melted white chocolate into your batter, mix again and then pour evenly into your pans. I used 2 9-inch pans. Set the oven for 30 minutes and let it bake.

The cakes were beautiful when they came out of the oven, however they were pretty difficult to get out of the pans. I greased the pans long before I even started to make the mix, so it might have dried, or the white chocolate may just be averse to sticking to the pan! I'm not sure, but we loosened them up pretty well, let them sit in the pans on the rack for about 45 minutes before taking them out, and then carefully pried them out of the pans to cool for a little while longer.
After the cakes were cooled, I mixed up the filling for the middle of the layers.

The filling for the cake is quite simple. A cup of raspberry jam and a cup of cream cheese frosting. In hindsight, I should have chilled both the frosting and the jam before I mixed them, because the filling was far too liquidy. However, it tasted ahhhhhhmazing. My sister and my father both ate the leftover with spoons straight from the bowl. They loved it, which was great! But now I had to figure out a way to solve the dilemma of super-liquidy filling... So I pulled out my bakery knowledge for this one.

I learned how to make dams in a cake by watching the decorators at the bakery. With our caramel cakes, and whenever they fill a cake with ganache, a dam of frosting has to be placed around the edge of the cake to keep the liquid from leaking out all over the place. Mine isn't very pretty, but it wasn't going to be seen, so I figured it was OK. Once again, I should have used chilled frosting, but I wasn't thinking, so I filled a sandwich bag with the leftover frosting from the first can and created a dam around the border of the cake.

Unfortunately, the combination of liquidy filling and room-temperature frosting was not a good one, and there were a few breeches. It was around this time that I realized I could put the cake in the refridgerator to firm everything up, so in it went!

A few hours later, I pulled the cake out to find it still in a semi-liquid consistency, but not at all near what it was previously and figured it was OK to ice... You can see the pure desire in my sister and I's faces at the thought of getting to devour this amazing cake in a few hours. :)

This is the finished product!
I carefully iced the outside of the cake with (most) of the remaining can of cream cheese frosting. There was about one or two tablespoons left in the can when I was finished. Some of the filling continued to leak out and turned the icing slightly purple, but it was still very pretty!
I spooned some of the extra raspberry jam into a sandwich bag and cut the corner off and used it in a spiral pattern around the cake, then just dragged a butter knife through to create a spider web look.

Due to the amount of people in attendance to my mother's party, we could not cut the cake like a pie, and instead cut it like cross-hatch style, which I figured would NOT be enough cake but WOW, was I wrong! I Did it 4 slices one direction and crossed it with 3 cuts the other direction, and the pieces were still HUGE. Everyone was satisfied with the amount of cake they had, and we even had 2 pieces left over! It looked gorgeous, and everyone at the party really seemed to enjoy it. We kept it in the refridgerator, and the filling sort of seeped into the layers of cake and made it sweet and fruity without the white chocolate being too overpowering.
I found that this recipe was pretty simple to do, but I learned a lot from my mistakes with now knowing to use chilled ingredients instead of room temperature so I can have a little more control over them! Haha.
Thanks for reading! Until next time!


