Friday, July 10, 2009

Lasagna Roll Ups

For the past ten days, my cousin Meghan has been visiting the family. For many various and complicated reasons, we have been out of contact with Meghan for the better part of the past ten years, and we were finally reunited with her at my sister's wedding in May. So, now that we finally became in contact with her again, we invited her up to stay with us for a week. She was here to help out during the Dessert Extravaganza '09 (aka: My mom's 50th birthday), and ever since then, she has told me how awesome my desserts are, but just because you can make good dessert doesn't mean you can cook "real" food... So I took her challenge, and decided to make dinner for the family!

Now, I had to set out to make the perfect dish for this event. We'd had a different meal every night Meghan had been here (which is strange for my family, since we tend to recycle meals quite often), and we'd already done burgers, grilled chicken, Chinese food and other such things, and the one thing I knew we hadn't had yet was pasta.

My cousin loves pasta, so I had to find a recipe that would accommodate a love for pasta, but also would accommodate my un-love for most vegetables. So I went back to my first love, Food Gawker and looked up some different pasta recipes, and I found..... Drum roll, please..... LASAGNA ROLL UPS. It's pretty much like lasagna, just the lasagna noodles are filled and rolled up and baked in with the sauce... So in essence, they are pretty much fancy pasta shells, but I wanted to try out the recipe so I bravely set foot into the local Kroger to purchase my ingredients.
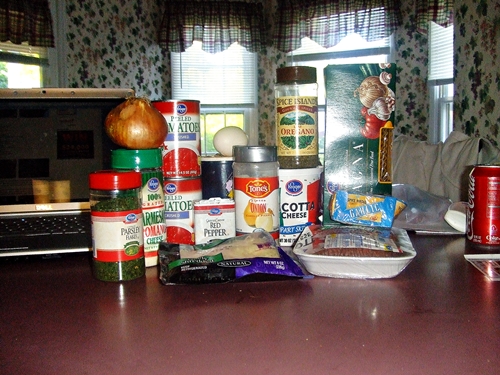

Ingredients list ;;
(note ;; I doubled the recipe because I was cooking for 6!)
1/2 lb. of beef
4 tblsp. of chopped onion
4 minced garlic cloves
2 16 oz. cans of crushed tomatoes
1 tsp. of salt
1 tsp. of dried oregano
2 dashes of cayenne pepper
2 1/2 cups of ricotta cheese
1/2 cup of grated Parmesan cheese
2 (lightly beaten) eggs
2 tblsp. of dried parsley
1/2 tsp. of onion powder
12 cooked lasagna noodles
1 cup shredded mozzarella cheese


Now I am going to preface this series of pictures and just let you all know that this was the hardest thing I have ever made. Trying to do all of the different pieces of the dish simultaneously was pretty difficult for me, so the pictures aren't pretty and the stress level was incredibly high. So keep in mind that in these pictures, pretty much everything was happening at the same time so I just stood in a circle with the flash going off in all directions while I took pictures :P


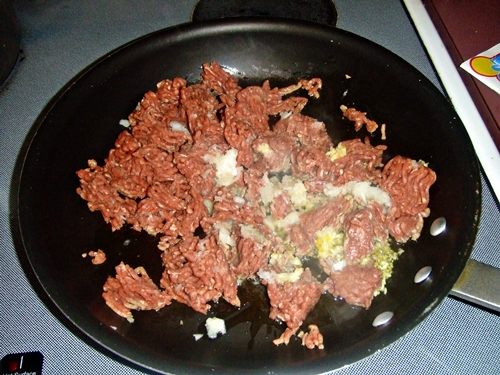
First, I began to brown my meat in a skillet with a little bit of olive oil. I added in the chopped onion (which I chopped in the food processor because I hate onion and wanted the pieces as small as possible) and the minced garlic and let it cook until browned.


While that was happening, I had started boiling a pot of water to cook my pasta in. I was afraid the noodles would all stick together if I cooked all 12 of them at the same time, so I decided to cook 6 of them at a time.


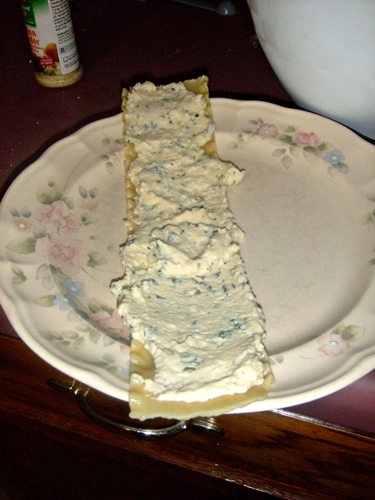
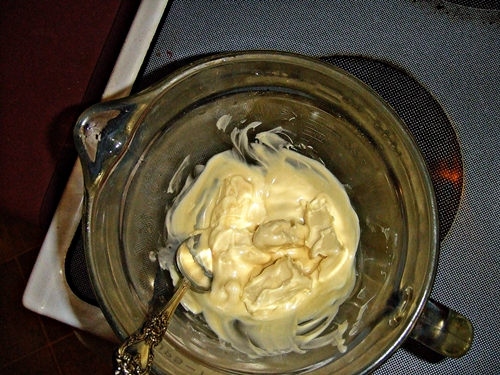
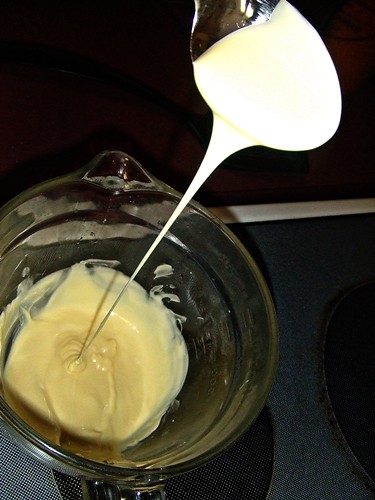
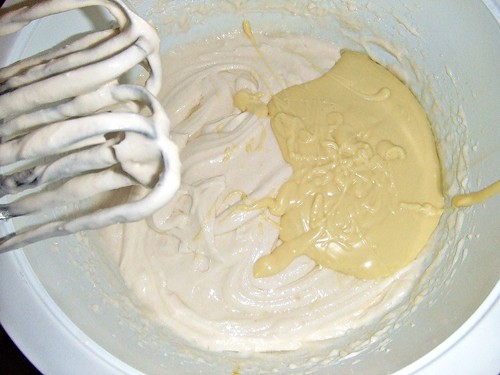
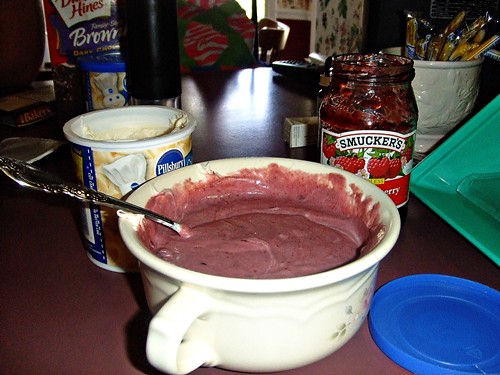
While the meat and the pasta were cooking, I decided to go ahead and mix up the filling. So I took my ricotta cheese, Parmesan cheese, onion powder, parsley and eggs, and put them all in the bowl to prepare for a mixin'


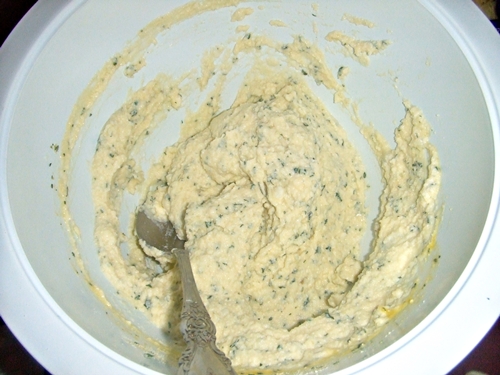
Since I had a bit of spare time, I mixed up all the ingredients to make my filling and then set it aside while I finished up some other stuff.


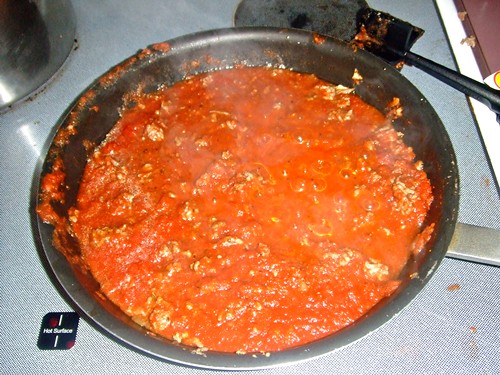
Once the meat was finished cooking, I drained the fat/oil out of it, then added in my crushed tomatoes, cayenne pepper and oregano, covered it and let it simmer for ten minutes.

Now, I couldn't go any further until my sauce was done cooking, so here goes a ten minute intermission where I cleaned up the disaster area that the kitchen had become in the last 25 minutes.

When the sauce is done, pour half into the bottom of 2 greased baking dishes (I used two because I had a double batch of the roll-ups).


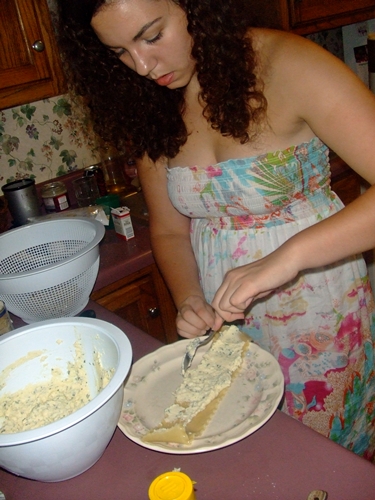
By this time, I had already taken out my first set of pasta noodles and set the next set in to start cooking. Now that the pasta sauce was ready, I started making my roll-ups. You just lay out the pasta noodle, take a big glob of the filling and spread it out all over the noodles until it is coated. Then, starting at one end, you roll it up the way you'd roll up a sleeping bag.


Then you place your roll seam-side down in the pan in the pasta mixture. Repeat this step until all of your noodles are used and the pans are full.


This is where my problems came from. I used too much of the cheese mixture for the first 6 noodles and didn't have enough for the last 3 or 4, so I decided to mix up half of a batch of the cheese mixture since I had plenty of the ingredients leftover, but I kind of messed it up and couldn't get it to the right consistency. I have no idea how they turned out because those went in with the leftovers. I can't imagine they'll be bad, they just had too much egg in them so I imagine the consistency will be a little more solid and a little less creamy.


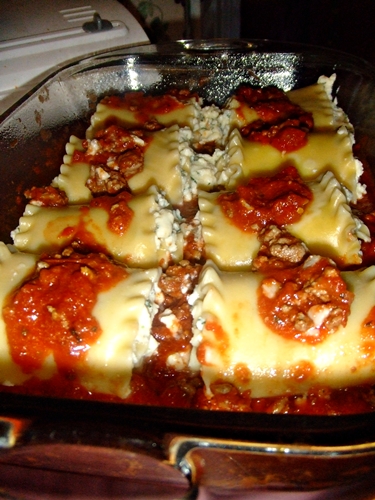
So once all of the roll ups are in place in your cooking pans, you will spoon some of the sauce over the top of them so that the noodles don't dry out in the baking process and become crispy/chewy.


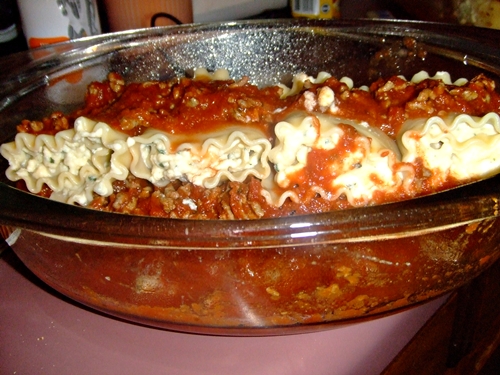
Don't they look yummy all getting ready to go into the oven? Mmm!

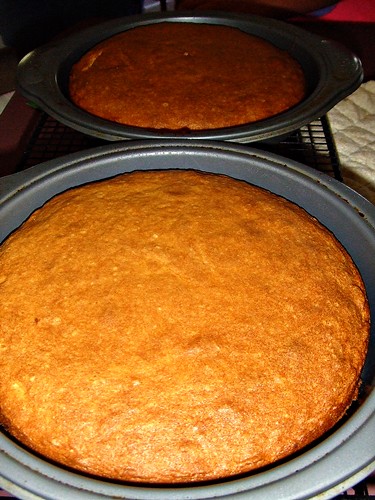
So you put them in the oven at 350 degrees and for 30-35 minutes, though 5 minutes before they are done, pull them out of the oven and top with the shredded mozzarella cheese and put back in for the remaining 5 minutes.


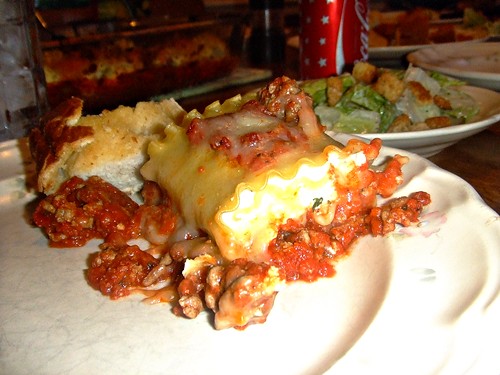
The finished product! Complete with garlic bread, a Caesar salad and of course, the ever-classy Classic Coca Cola to drink. ;)

So let me just tell you, along with being the most complicated recipe I have ever made, it was also the most expensive. The recipe said you could use cottage cheese instead of Ricotta, but my mom insisted on the ricotta so that is what I used. It was about $20 for the ingredients (which is really expensive for me since I've only spent MAYBE half that on the other meals I've made). I just think this was too much effort to put into a meal for the family... It was really really tasty, but very tine consuming and stressful. I'm sure I would make it again if the family asked me to, but I wouldn't make it for myself at school. It was just a "special-day" dinner!

Thanks for reading!
Until next time

Sunday, July 5, 2009

Chocolate Covered Strawberries

Chocolate covered seems to be a running theme in this blog... But if you have to have a theme, I'd say that's a pretty good one to have.

Now, in my last post, I mentioned something about making a fruity, a chocolate and a chocolate fruity... Well here you have it, the chocolate fruity in the form of: chocolate covered strawberries.

Now, there are loads of sources online that teach you how to make these babies, but I think that it's pretty self-explanatory... Plus, working at the bakery, I saw these delicious little treats being made several times a week. Monkey see, monkey do!

The good thing was, we didn't even really need to buy the ingredients for them.

All you really need are:
Strawberries (as many as you want)
Chocolate (we used Baking Chocolate and Hershey Semi-Sweet Chocolate Chips)
White Chocolate (if you are so inclined)


My parents already had the strawberries, and they were gorgeous! I honestly have no idea how many we used, but it isn't necessary to have an exact amount. Strawberries are tasty by themselves if you have them leftover, and you can eat/make bark out of the chocolate you have leftover so it's a win-win situation.

And to prepare the strawberries, they need to be washed and completely dried before you dip them in the chocolate.


The chocolate we used was the Baking Chocolate you can get at Kroger (3 squares) and 3/4 of a bag of the chocolate chips.


We melted the chocolate at 30 second intervals on Power 6 until it was melted. It took about 4 rounds in the microwave with stirs between each round until it reached that perfectly smooth, liquidy consistency.


Next comes the dipping. You want to carefully hold the strawberries by the green and dip them into the chocolate. If you don't have a super-deep bowl, you might just roll it a little in the chocolate. You want to make sure that the chocolate stays pretty warm so that it maintains the glossy texture. If you let the chocolate cool too much, then the texture looks kinda rough... So if you're going for looks, definitely keep your chocolate warm!


Once the strawberry is dipped, place them on a baking sheet lined with parchment paper. Once the chocolate cools, it peels straight off the parchment paper, which is why it's the best liner to use for desserts like this.


We filled 2 pans up with chocolate covered strawberries, but we really didn't make a ridiculous amount. Maybe about 30 or so. When you are placing the strawberries on the pan, you want to make sure that you don't put them too close together. You want the strawberries to have a good distance apart so that they don't stick to each other.


The lucky thing was... The baking chocolate came in packs of 6 squares, but I only needed 5 for the cake, so I melted the last one down and used a fork to drizzle the white chocolate all over the strawberries. Yummy, right?

It's pretty hot here in Tennessee, so we put the pans of strawberries into the refridgerator to chill until ready to serve, then put them on a pretty plate and walked them around like after dinner dessert hors'doeuvres.

So what to do with the leftovers?


Eat them, of course!


Thanks for reading!
Until next time!

Saturday, July 4, 2009

White Chocolate Raspberry Cake

So it has been a little while since my last post, but I have good excuses! No such thing!! I've been working like crazy, and even on my days off I have been really busy so there hasn't been much time for me to be cooking, but a fabulous opportunity presented itself yesterday: My Mother's 50th 29th Birthday Celebration! So I was incredibly busy yesterday because I was in charge of desserts. I made three different desserts... A fruity, a chocolate and a chocolate fruity. This post will be "The Fruity," my next post will be "The Chocolate Fruity" and then I won't do a post for "The Chocolate" because it was just a boxed brownie mix with chocolate chips added, nothing fancy!

But yes! My mother's favorite fruit is Raspberry. She loves raspberry EVERYTHING... And she LOVES white chocolate. Now, at the Bakery where I work, they make a White Chocolate Raspberry Cake. While I have never had it, I've always wanted to try it. White chocolate cake with a raspberry jam filling and whipped icing. Now, this seems like the perfect dessert for my mother on her birthday, but the cake where I work costs a pretty penny even with my discount, so I decided to tackle this delectable dessert on my own, and ended up saving a TON (which is quite the goal of this blog, right? Being able to learn to cook great food with using a college student's resources, one of which is a very limited income.)

So first I had to do some research, and I found the recipe I wanted to use HERE via The Herta Household Herald. I found it by google image searching "white chocolate raspberry cake," which is generally what I do when I am looking for a specific recipe.

So now that I have my recipe, let's get started!


My ingredients list!
1 box of white cake mix* <--- I chose to use Pilsbury Moist Supreme in Classic White. I always choose this brand when I can because the cake has a cup of pudding mix in it to make it suuuper moist and delicious.
3 egg whites (in the bowl. If you are wondering why they are in a bowl, I read here that you should always use room temperature eggs when baking!**
1 1/3 cups water (not pictured)
2 TBSP cooking oil
5 oz. white baking chocolate
2 16 oz containers of cream cheese frosting
1 18 oz jar of raspberry jam

As you can see, I strayed a bit from the recipe on the web site, which calls for only one can of the frosting (but I think that's because she made homemade buttercream to go on the outside of the cake, because 1 can is definitely not enough for the filling AND for the outside. Also, this recipe called for preserves while I used jam, because I'm not a fan of raspberry seeds... And the jam was SO tasty.

* I know! Using a baking mix is SO taboo in the baking world, but for a cheap college students, it's so much easier to spend $.98 on a baking mix than spend $10.00 on ingredients to bake a cake, which I most-likely won't have super proper-storage containers for and all of that. It's just easier and more cost-effective to use a mix, PLUS-- The people who I am (and will be) cooking for aren't really going to care if I use a boxed mix. Now... When I am in my own home with a family and a fully functioning kitchen that only I will be using, then MOS DEF will I be baking cakes and all other such things from scratch (or attempting to, anyways) but for now, mixes will do!
** I had never tried to bake cakes with room temperature eggs before. I tried to with the Oreo Cake but I don't think I let them sit long enough. These ones sat for quite a while, and when the cake came out of the oven, I didn't have those strange mounds that I get when I bake cakes normally, which was pretty awesome!


The first task you have is to separate your eggs. I'd never had to separate eggs before, and while one of them didn't come out so pretty, I just thought that the separated eggs looked really neat just chillin' in their shells.


After separating your eggs, combine the mix, oil, water and egg whites into a bowl. Here it is, looking particularly gruel-ish.


Then, using a mixer, (which I never used to use, but LOVE now) mix on LOW until ingredients are damp, and then mix on MEDIUM for 2 minutes until the mix is nice and smooth. I never used to use a mixer, but when I started with this recipe, I noticed how much more smooth the batter came out. It seemed to have a much better texture, and when the cake came out of the oven it was lighter and fluffier and much better than cakes turn out when I mix the batter by hand!


I think cake batter smells so heavenly, and I would probably sit there and eat it with a spoon for however long I could go without getting sick from all the sweetness!


The next step is to melt your white chocolate squares. My method of choice is breaking up the cute little bars in half and put them in a glass bowl, then microwave on Power 7 for 30 seconds, stirring until it is all nice and melted.


Ahhhh, perfection! It was smooth and creamy and smelled AMAZING and was not scorched!


So add your melted white chocolate into your batter, mix again and then pour evenly into your pans. I used 2 9-inch pans. Set the oven for 30 minutes and let it bake.


The cakes were beautiful when they came out of the oven, however they were pretty difficult to get out of the pans. I greased the pans long before I even started to make the mix, so it might have dried, or the white chocolate may just be averse to sticking to the pan! I'm not sure, but we loosened them up pretty well, let them sit in the pans on the rack for about 45 minutes before taking them out, and then carefully pried them out of the pans to cool for a little while longer.

After the cakes were cooled, I mixed up the filling for the middle of the layers.


The filling for the cake is quite simple. A cup of raspberry jam and a cup of cream cheese frosting. In hindsight, I should have chilled both the frosting and the jam before I mixed them, because the filling was far too liquidy. However, it tasted ahhhhhhmazing. My sister and my father both ate the leftover with spoons straight from the bowl. They loved it, which was great! But now I had to figure out a way to solve the dilemma of super-liquidy filling... So I pulled out my bakery knowledge for this one.


I learned how to make dams in a cake by watching the decorators at the bakery. With our caramel cakes, and whenever they fill a cake with ganache, a dam of frosting has to be placed around the edge of the cake to keep the liquid from leaking out all over the place. Mine isn't very pretty, but it wasn't going to be seen, so I figured it was OK. Once again, I should have used chilled frosting, but I wasn't thinking, so I filled a sandwich bag with the leftover frosting from the first can and created a dam around the border of the cake.


Unfortunately, the combination of liquidy filling and room-temperature frosting was not a good one, and there were a few breeches. It was around this time that I realized I could put the cake in the refridgerator to firm everything up, so in it went!


A few hours later, I pulled the cake out to find it still in a semi-liquid consistency, but not at all near what it was previously and figured it was OK to ice... You can see the pure desire in my sister and I's faces at the thought of getting to devour this amazing cake in a few hours. :)


This is the finished product!

I carefully iced the outside of the cake with (most) of the remaining can of cream cheese frosting. There was about one or two tablespoons left in the can when I was finished. Some of the filling continued to leak out and turned the icing slightly purple, but it was still very pretty!

I spooned some of the extra raspberry jam into a sandwich bag and cut the corner off and used it in a spiral pattern around the cake, then just dragged a butter knife through to create a spider web look.


Due to the amount of people in attendance to my mother's party, we could not cut the cake like a pie, and instead cut it like cross-hatch style, which I figured would NOT be enough cake but WOW, was I wrong! I Did it 4 slices one direction and crossed it with 3 cuts the other direction, and the pieces were still HUGE. Everyone was satisfied with the amount of cake they had, and we even had 2 pieces left over! It looked gorgeous, and everyone at the party really seemed to enjoy it. We kept it in the refridgerator, and the filling sort of seeped into the layers of cake and made it sweet and fruity without the white chocolate being too overpowering.


I found that this recipe was pretty simple to do, but I learned a lot from my mistakes with now knowing to use chilled ingredients instead of room temperature so I can have a little more control over them! Haha.

Thanks for reading! Until next time!